Campaign status
When creating campaigns, there are various steps you work through:
- Planning the stages of your campaign
- Testing the stages of your campaign
And, once ready:
- Publishing to the Live environment in order to communicate your marketing message(s)
PeopleStage provides 3 distinct environments for you to undertake these steps, each one accessed via the status control icon located top-left of the diagram:

Initially the icon will appear ghosted but clicking on the status control icon opens the dialog window with tabs providing access to the Plan, Test, and Live environments.
A ghosted icon indicates that the Area or Campaign is not currently 'checked out' and cannot be edited. To create new, or make changes to existing, you must first select Edit Area / Edit Campaign.
Plan
To set up a new Area or Campaign, you work in Plan mode.
To check an item out and switch to editable mode:
-
Click on the status control icon and, from within the Plan tab window, select Edit Area or Edit Campaign – according to the level at which you are working
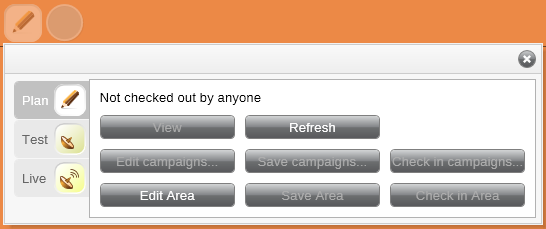
Once checked out, the pencil icon will no longer be ghosted and you will have access to other options within the dialog window. The background is now a grey and white grid, also indicating that it is now editable.
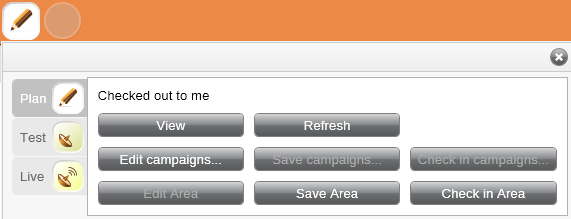
Note
Some options will only be available once you have begun your planning and may initially be greyed out.
Info
When you drag, for example, a New Campaign from the Library, that campaign will automatically be editable by you but, when you are amending an existing campaign, you will always need to make the item editable first.
Once editable, you can use all the items in the Library to create your campaign. To make a start:
- Drag and drop the component parts - New Audience, New Message and New Pool
See Creating a campaign.
Test
Once you have created your campaign in Plan, the Test environment allows you to check the flow of your campaign for errors and preview the volume of individuals moving through the campaign at that point in time.
Running the campaign through Test produces an output file but does not upload the file or record the information into the Communication History. It is a dummy run; no communication is actually sent.
Note
Should you wish to preview a sample of the output file, select the Requires Manual Approval check box within the Delivery step.
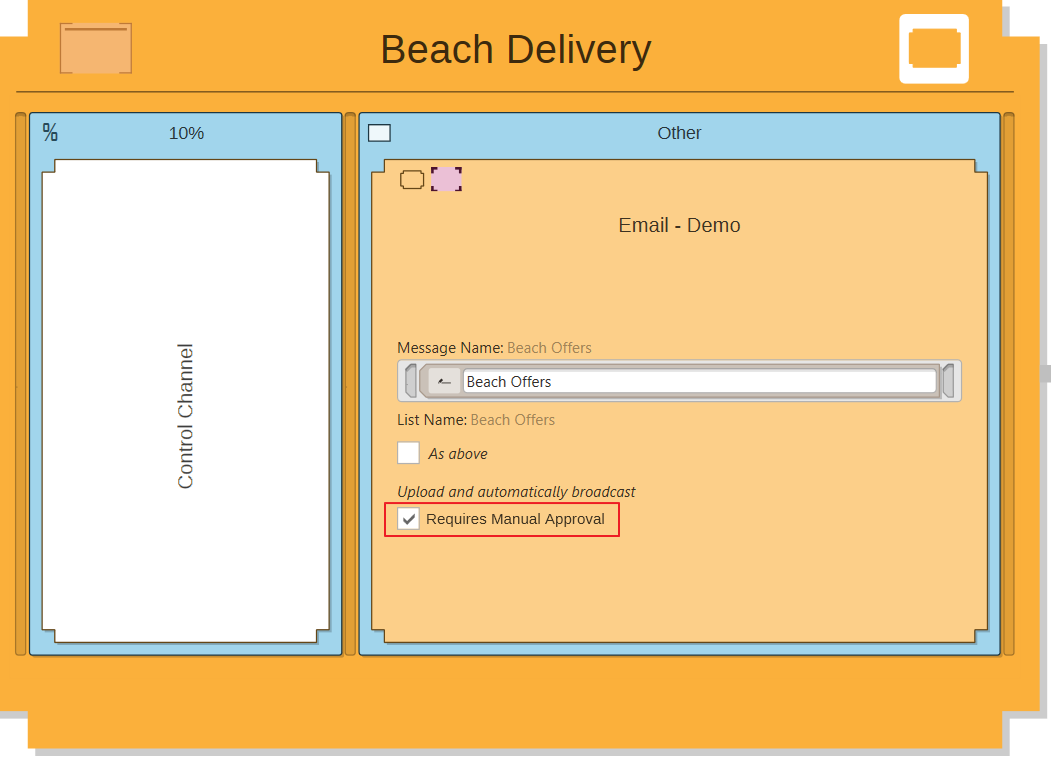
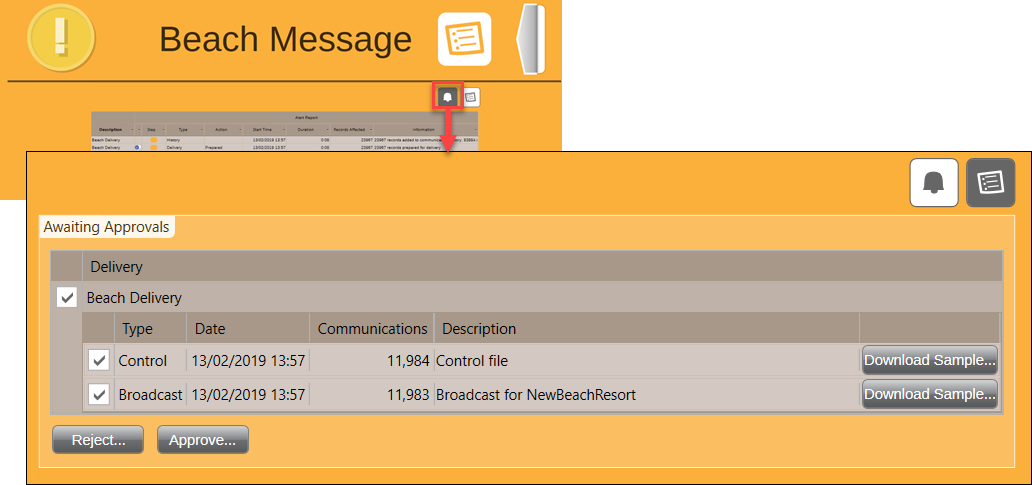
This determines that, when the campaign runs (in the Test or Live environments), you can download and check a sample of records from the output file before proceeding. Options include approving the delivery and transferring the file according to the channel definition(s) or, if you need to modify the campaign, you can reject the delivery and make any required changes before running and publishing the campaign again.
See Manual approval.
To publish your campaign in the Test environment you must first set a schedule on the Audience step whilst in Plan mode. See Scheduling a campaign.
- Zoom into the Audience step and switch to the Schedule view
- Set a Single Instance schedule of Now and, if this is the first time of setting the schedule, click Create
- Click on the status control icon and Save or Check In to save the changes
To switch into the Test environment:
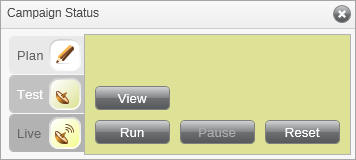
- Click on the status control icon, select the Test tab
-
Choose Run
The status control icon changes to reflect that you are in the Test environment, as does the background colour - now a light green.
The following message appears:
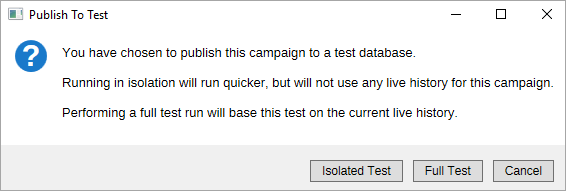
Isolated Test – runs the campaign as though there are no dependencies upon previous Communication History and no Contact Strategy defined for the campaign area. Consequently, an Isolated Test runs faster than a Full Test.
Full Test – runs the campaign based on existing Communication History and considers any other campaigns in the area, together with constraints which have been applied. This allows PeopleStage to produce a volume of individuals equivalent to when this campaign is run in Live mode. A Full Test is slower because more processing must happen in the background to consider other campaigns and constraints.
When a campaign (or campaign stage) run in Test is subsequently run in the Live environment, PeopleStage automatically resets and clears any data from the test database for this campaign.
If the campaign is not subsequently published in Live mode, and is no longer required, it is best practice to manually undertake the cleardown. In the Test dialog:
-
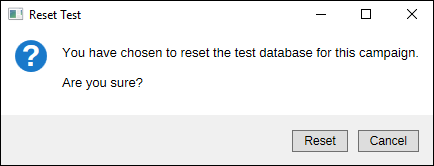
Select Reset
And again, when prompted:
-
Select Reset
Live
Once you have created your campaign in Plan and, optionally checked both the flow and volumes in Test, to actually send your communication you must publish the campaign in the Live environment.
To publish a campaign in the Live environment:
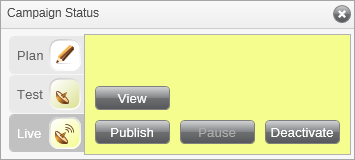
- Click on the status control icon and select the Live tab
-
Select Publish
Note
The status control changes to reflect that you are now in the Live environment, as does the background colour – now yellow.
Publishing to Live requires you to enter your password to confirm and authorise this action:
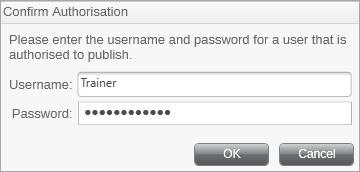
The Live mode will begin following the schedule set up on the Audience step(s).
When PeopleStage is running the campaign in Live mode:
-
Progress indicators will appear – hover to see details
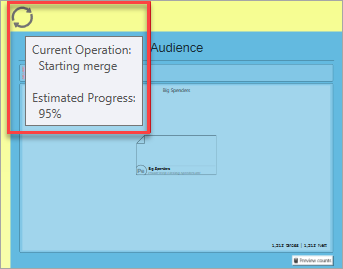
Initially the connecting lines will be black indicating that the campaign has published but is yet to run. Once a campaign stage has run, the line will become blue, indicating that PeopleStage has processed that part of the campaign and moved people on.
Hover over a line to see how many people have moved through that stage – in the last run and in total:
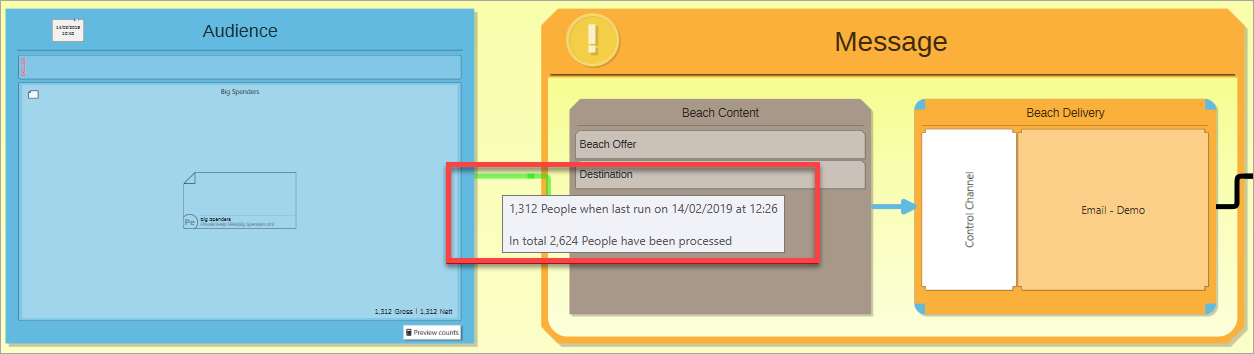
A black line indicates that PeopleStage hasn't moved people on yet. It may be that it is still processing an earlier stage or, in this example, the Requires Manual Approval warning Manual approval, indicates that people are currently being held in an internal pool on the delivery step until the approval is given.
Info
Hover over a blue corner on the delivery step to see the number of records awaiting approval:
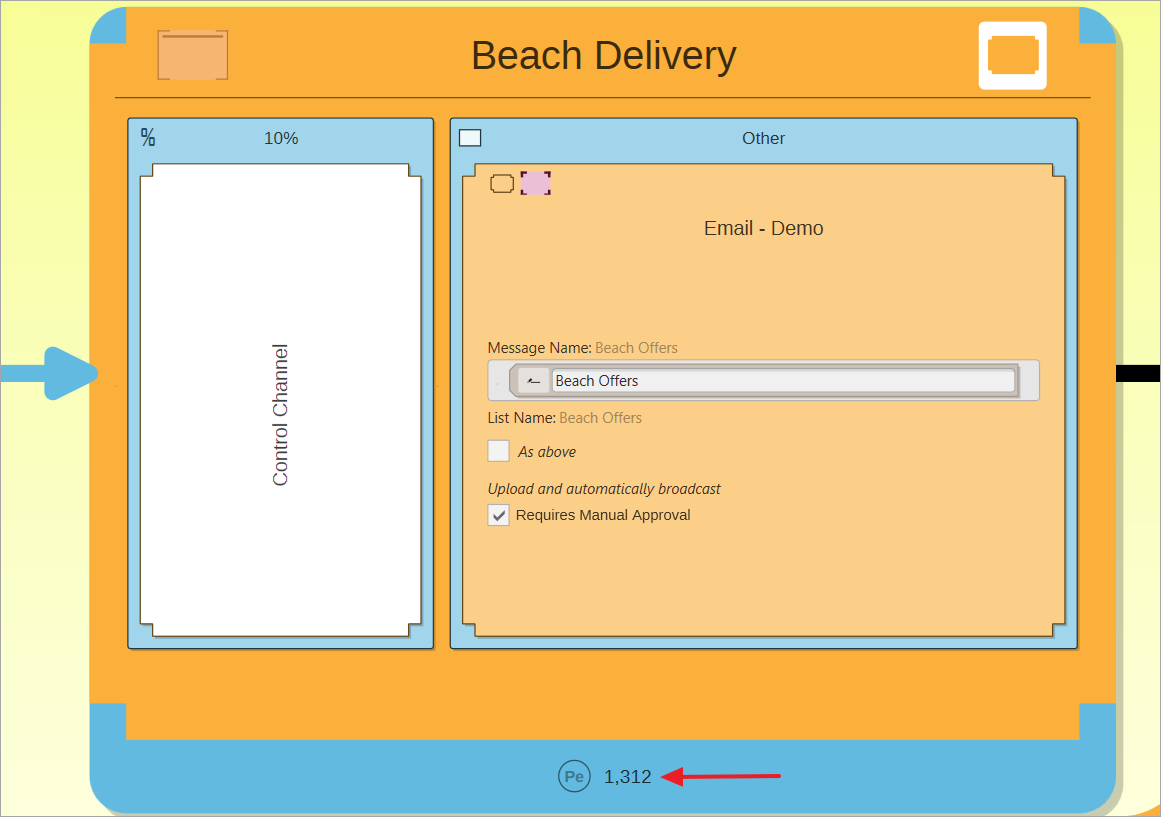
Note
When publishing a campaign on a recurring schedule, you will initially see blue lines with a black border indicating that this stage of the campaign has run previously but is about to run again. Once complete, the line will return to blue; a deeper blue indicates that a higher number of records have moved through that stage of the campaign.